AdPresso placements are predefined positions that serve as the structural interface between your ad inventory and your website layout. They enable centralized ad management without modifying theme files or individual posts, making your workflow more efficient, consistent, and scalable.
By defining insertion rules, you can automatically inject ads across your entire content archive. This auto-injection is particularly powerful for content-heavy websites, as it systematically handles ad delivery across selected content types based on your predefined logic.
All configurations—including position, assigned ads, display conditions, and layout settings—are managed from a single interface in the AdPresso backend. Changes apply globally, allowing you to swap creatives, adjust rotations, or optimize your ad performance.
While manual embedding ads via shortcodes or the block editor remains an option for specific integrations, utilizing placements is the structural prerequisite for unlocking AdPresso’s full technical suite, including Lazy Loading, repeated injection, and advanced AdBlocker fallbacks.
AdPresso provides six core placement types out of the box. They offer a robust framework to cover the vast majority of standard WordPress advertising scenarios.


For users requiring advanced monetization and high-impact layouts, AdPresso Pro expands this framework with premium placement types:


A Manual Placement is not automatically displayed within your content and only appears where you deliberately insert it, for example, by utilizing a WordPress block or the placement’s unique shortcode.

This placement type is designed for any scenario where you want full control over an ad's exact positioning. Although the placement is inserted manually, the assigned ads and their configurations remain centrally managed in AdPresso. This allows you to reuse the same placement in multiple locations across your site while still updating the underlying ad content or rotation logic from a single screen in the backend.
To retrieve the shortcode for a Manual Placement, hover over its Quick Edit menu on the placements overview page.
The Header Code placement inserts scripts or code snippets directly before the closing head tag of your website. It is not designed to display visible ads in the frontend header and serves purely technical purposes. Code added through this placement runs in the background and loads early in the page lifecycle.

Typical use cases include header tags from ad networks like Google Ad Manager, as well as verification codes and tracking scripts required by analytics platforms. A dedicated ad unit assigned to this placement can contain all necessary verification and tracking scripts to keep your website structured.
Tip: In many cases, this also makes separate header-injection plugins unnecessary because AdPresso can handle the integration directly within your monetization workflow.
The Footer Code placement injects scripts or snippets directly before the closing body tag. While it could technically output visible content, its primary purpose is to load scripts that should execute after the main content has rendered. This helps protect initial page speed.

Common examples include analytics scripts or chat widgets, as well as performance tools and third-party integrations designed to load at the end of the document.
Like the Header Code placement, it allows you to manage these elements centrally without touching any theme files.
The Before and After Content placements inject ads directly before or after the main content of single posts or static pages. Both are limited to singular views and do not execute on archive pages, category listings, or the homepage.

Before Content places the ad at the very beginning of the article, which is ideal for high-priority messages, time-sensitive offers, and premium campaigns that benefit from immediate visibility.
The After Content Placement embeds the ads at the end of the article. This position is well-suited for call- to-action elements, related content modules, or author boxes.
Tip: Combined with AdPresso’s author condition, you can create dynamic author-specific elements without relying on additional author box plugins.
Content placement is the most widely used option for monetizing editorial content and the backbone of monetization for content-heavy WordPress sites. It automatically injects ads into posts and pages. You can define precise insertion rules, such as placing ads before or after paragraphs, headlines, images, or specific div containers.

Advanced options allow you to repeat injections and define minimum word distances between ads to achieve a balanced ad setup.
The Above Title placement inserts an ad directly before the main H1 headline on single posts and pages. Because of its prominent position at the very top of the content area, it delivers exceptional visibility.

It is particularly effective for high-impact formats such as leaderboard banners or important announcements that require maximum exposure without interfering with navigation elements.
The Header Bar Placement is stuck at the top of the viewport and remains visible while users scroll. It is ideal for countdown campaigns or internal promotions, as well as navigation elements and strong calls to action that should remain permanently in view.

The Footer Bar works similarly but is anchored to the bottom of the screen. It also stays visible during scrolling. Due to its persistent presence, it is known for generating strong click-through rates while maintaining a clean content layout.
This placement embeds an image ad in the background of your website, making it ideal for large-format skin ads.

The Placements overview page is the primary control hub for managing your entire ad setup. From this interface, you can edit and create placements. Clicking a placement opens a dedicated edit modal to rename it, assign ads or groups, define display conditions, and configure settings such as ad labels and alignment. For larger ad setups, the filtering and search tools let you quickly access specific configurations.
Setting up a new placement takes only a few steps.
From this point on, this placement becomes part of your ad setup and is ready to deliver.
Beyond defining the structural position, placements can also control where, how, and under which circumstances ads appear.
AdPresso Pro allows you to apply conditions directly to the placement. Technically speaking, the plugin checks the placement conditions before ad delivery, and if they are not met, none of the assigned ads will render. The conditions you apply to the ad unit further refine the logic, since both the placement and ad conditions must be met for an ad to appear.
For example, you might add the Device condition to a sticky anchor placement to deliver the ad only to users with mobile devices. Additionally, the ad unit assigned to this placement has a Post Content condition to target articles that contain the term "WordPress".
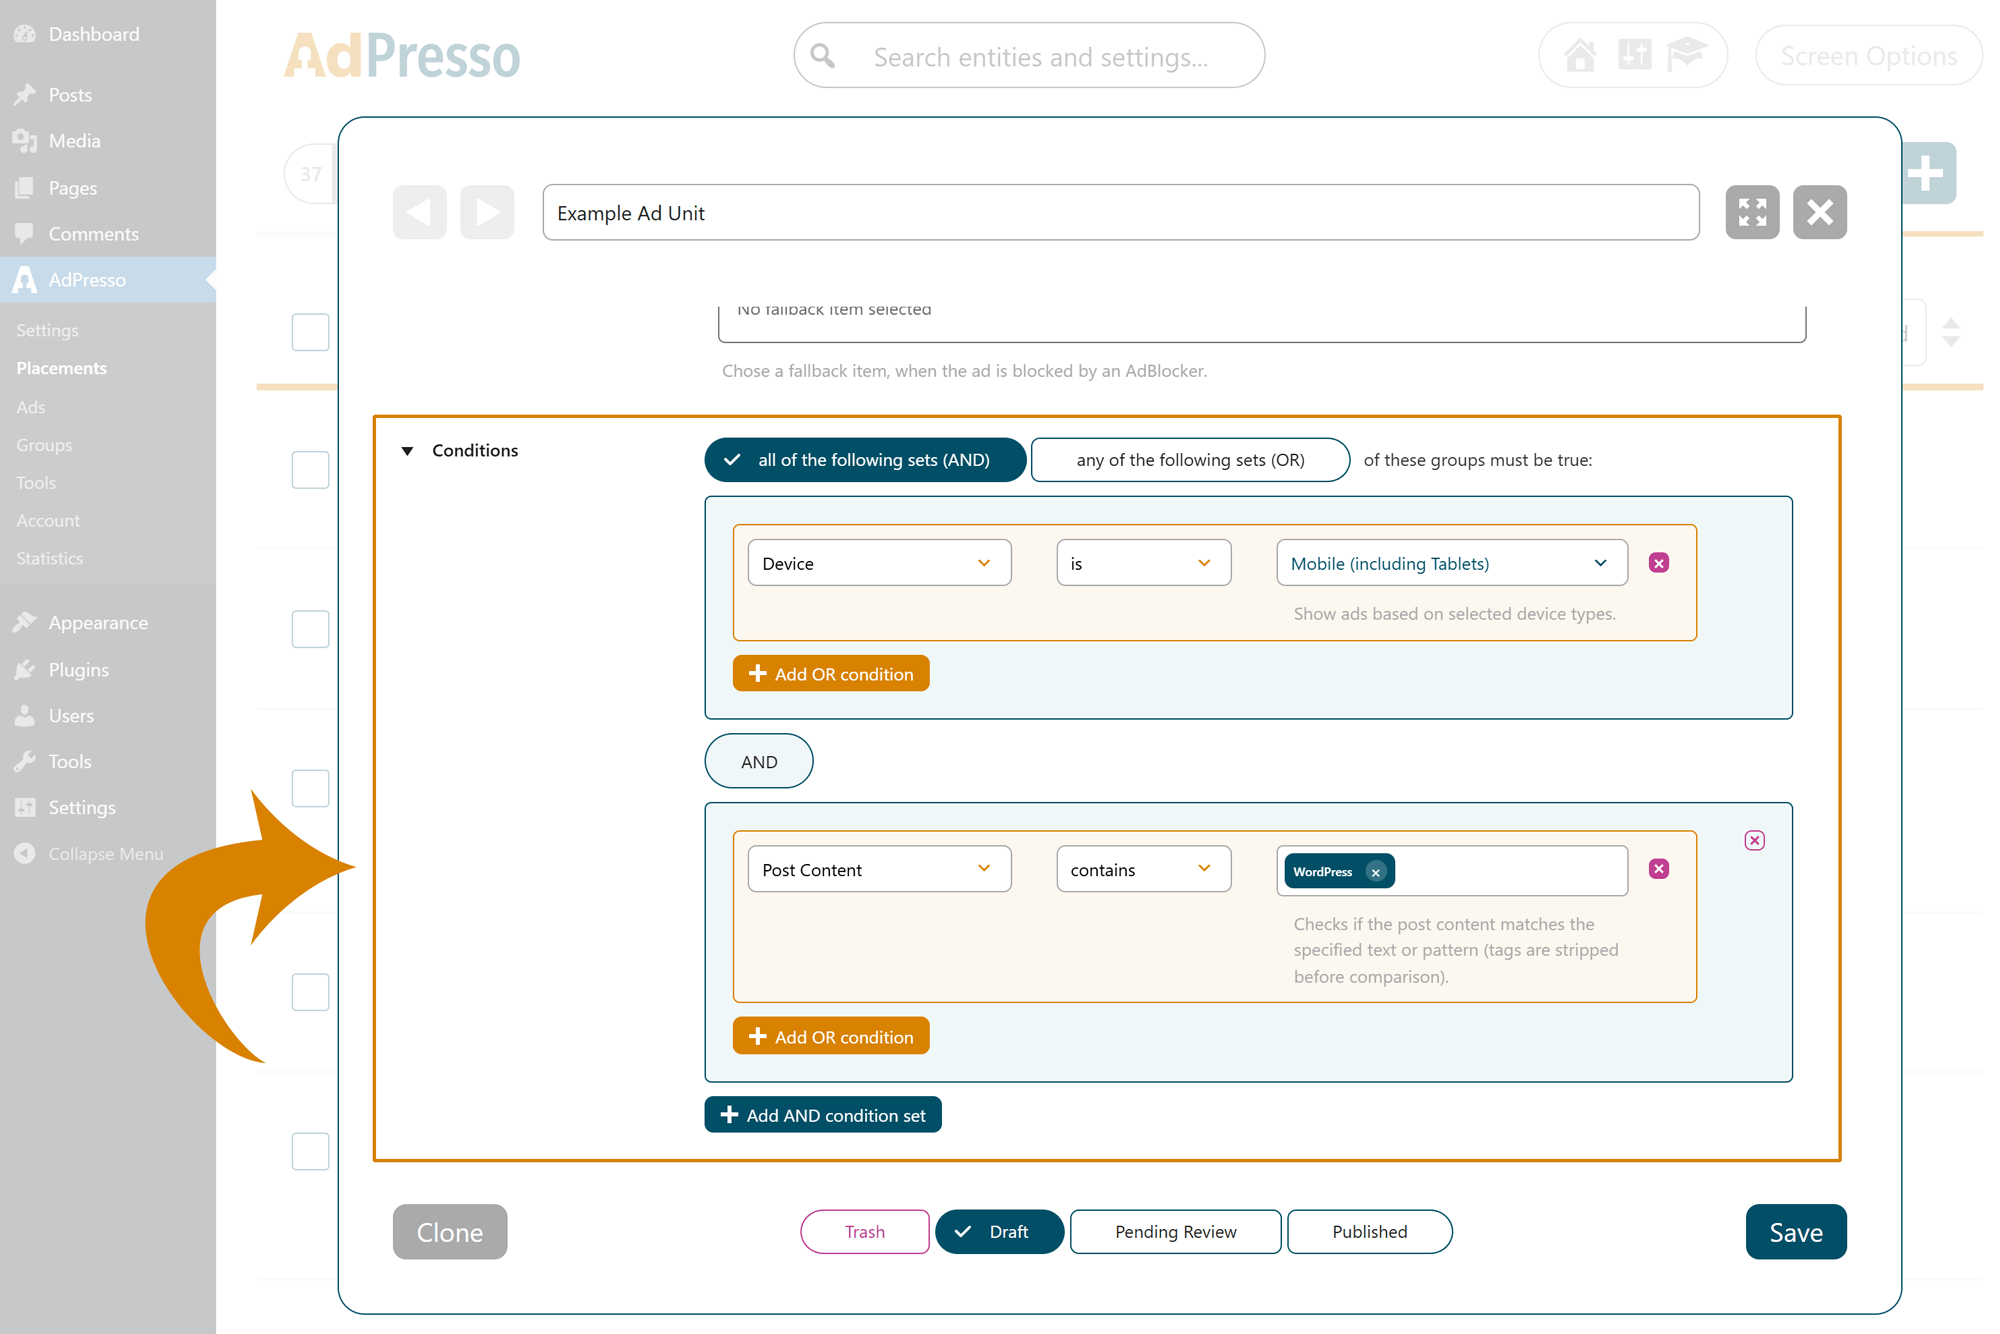
As a result, the ad will only appear to users on mobile devices who open a post from the selected category.
If a placement is mobile-only but an assigned ad is desktop-only, no ad will show because the conditions do not match.
AdPresso lets you customize how each placement appears and behaves on your website. From alignment to margins, labels, and custom styling, you can fine-tune every aspect to fit your theme and content structure.
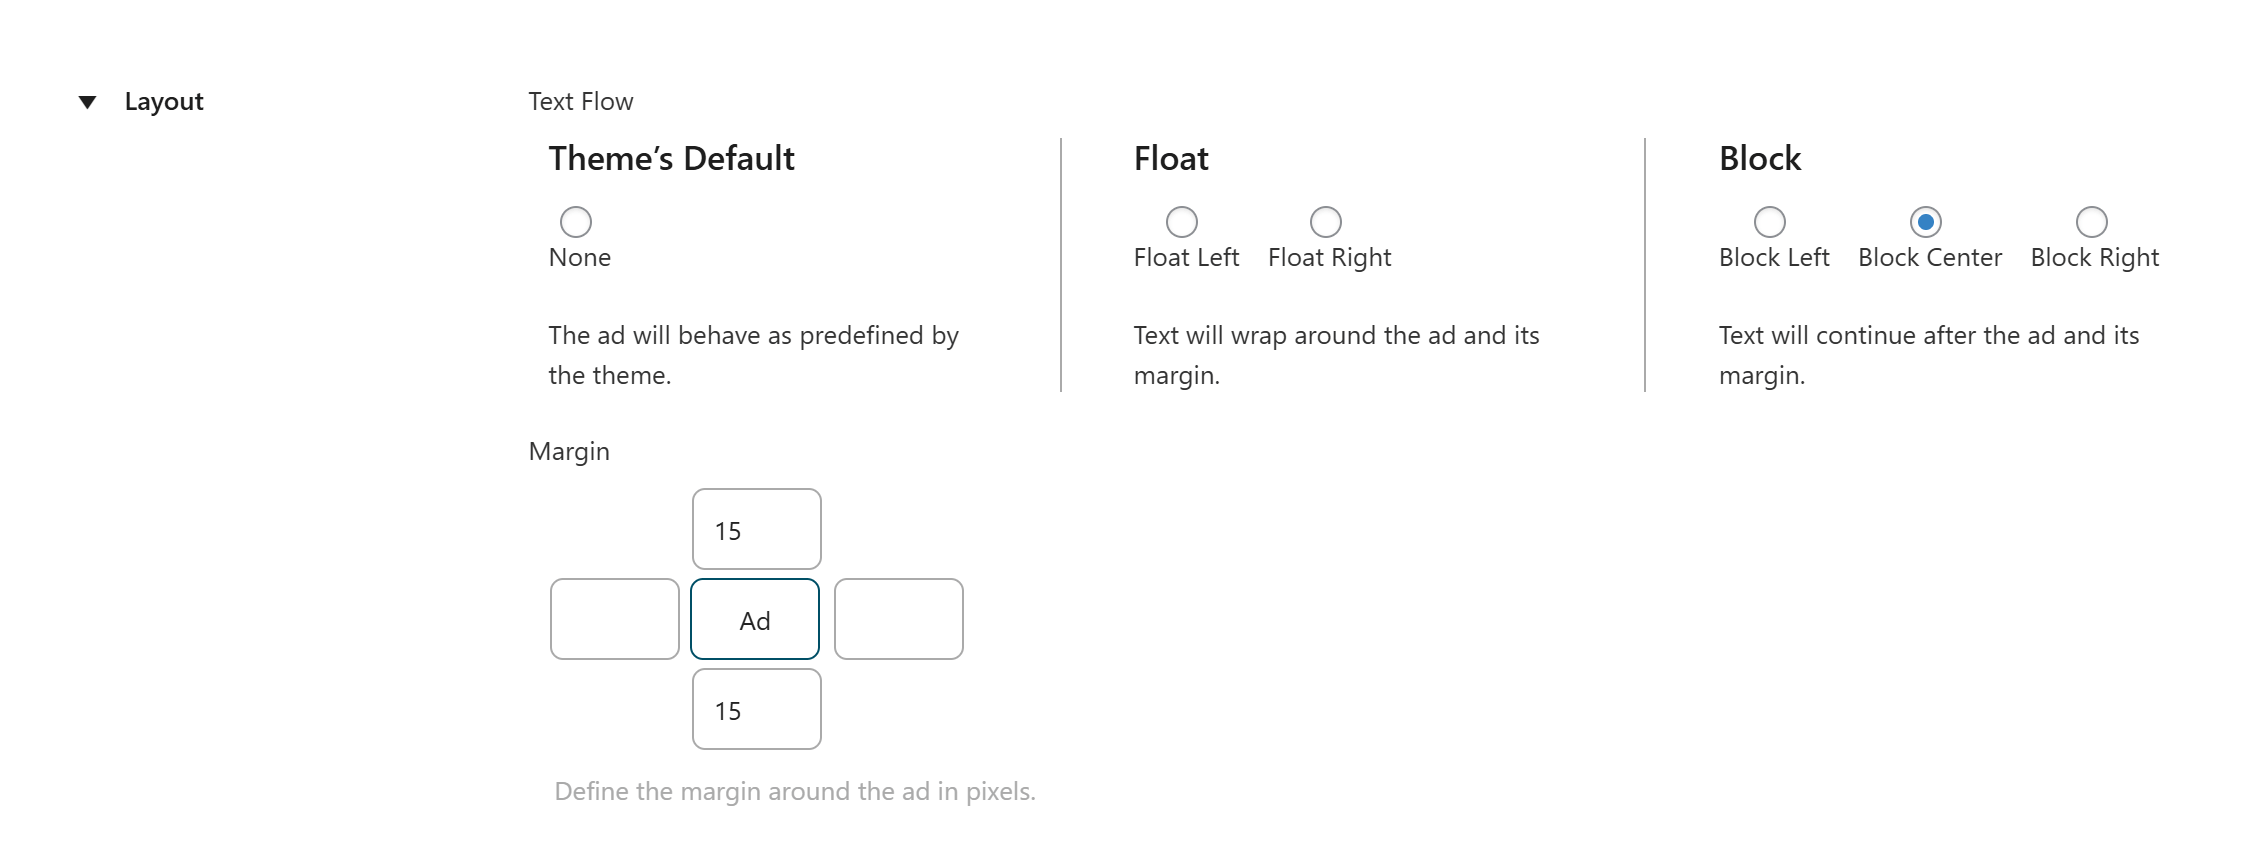
Choose how your ad interacts with surrounding content:
Define custom spacing around the ad—top, bottom, left, and right—to control how it sits in relation to other elements. This helps keep your design clean and readable while ensuring ads don’t feel intrusive.
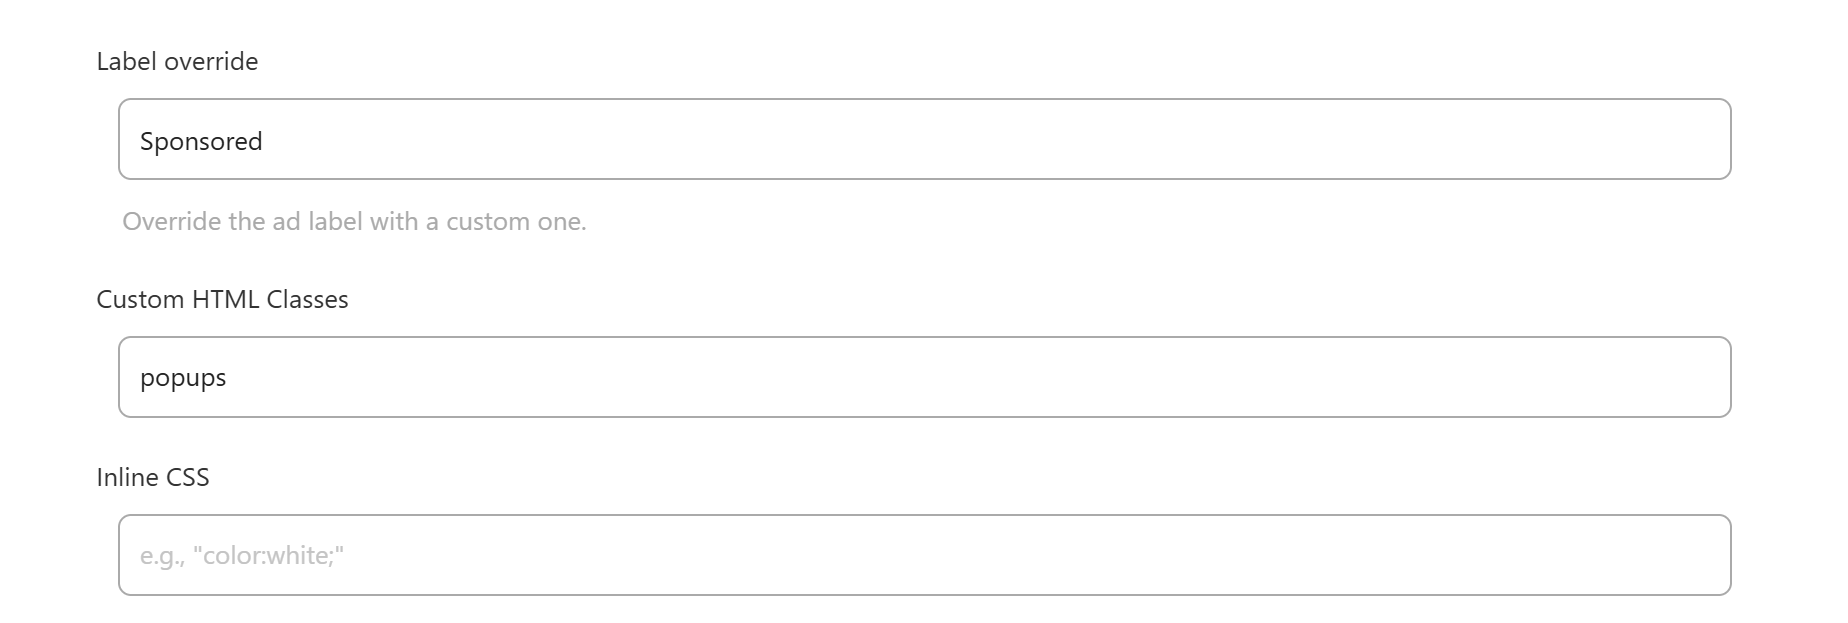
If you are running AdPresso Pro, you can optionally override the global ad label and define a custom one. This is useful for special campaigns or when different placements require distinct labeling for compliance or UX purposes.
Each placement comes with dedicated fields to optionally set one or more HTML classes or insert inline CSS to modify its styling and behavior.
The most common use case is setting a minimum ad height. By reserving space before an ad loads, you prevent cumulative layout shift (CLS), which can cause sudden layout jumps and negatively impact SEO.
Some premium features give you extra control, helping you optimize loading behavior and handle ad blockers gracefully.
Placements can deliver custom code along with the ad unit. This feature is perfect for integrating third-party tracking scripts, additional CSS rules, or other specialized functionality tied to that specific placement.

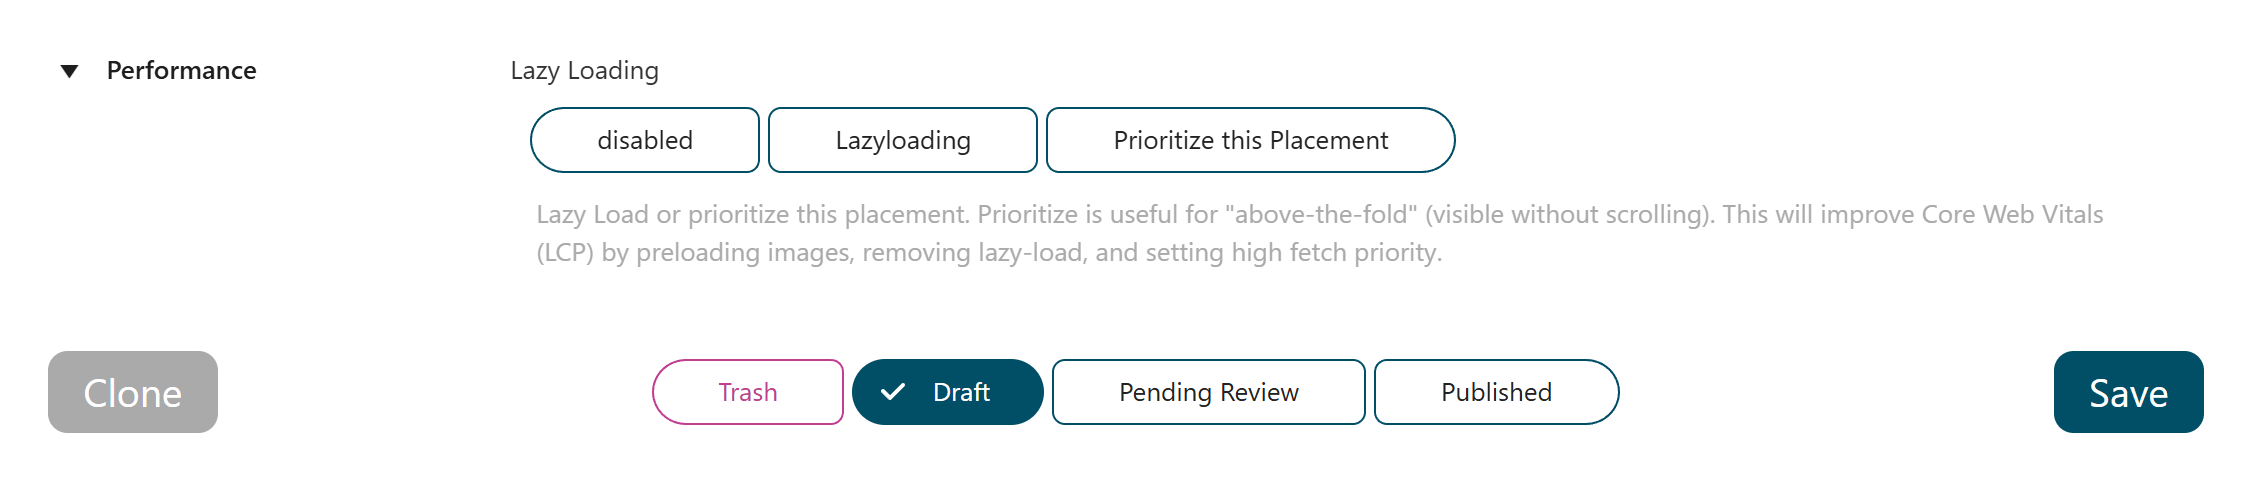
In this section, you can enable Lazy Loading for a placement. By default, this option is not active. If enabled, the ad will only load when a user scrolls near its position, reducing initial page load time and improving overall performance.
For high-impact placements above the fold, you can use the opposite approach and prioritize quick loading for that placement. The result is faster rendering and improved Core Web Vitals metrics, especially Largest Contentful Paint (LCP).
For each placement, you can define a fallback item that shows when a user has an ad blocker enabled. AdPresso will automatically serve the fallback item to help monetize such ad impressions.