The Content Placement is the central mechanism for scalable advertising on WordPress sites with growing content archives. Instead of manually inserting ads into individual posts, you define a single structural rule and let AdPresso handle the injection across all selected pages instantly. This ensures a consistent ad strategy even for thousands of existing articles without ever touching a shortcode or block again.
Technically, the placement parses your content to place ads at structurally relevant points, such as paragraphs, headlines, or containers. By using these predefined HTML elements rather than fixed pixel positions, your ads remain natively integrated into the reading flow, maintaining a professional layout while maximizing your revenue potential.
Setting up a Content Placement requires only a few steps:
Once published, the placement becomes active and injects ads according to your defined logic.
The core of this placement type is the injection rule. You define after or before which structural element AdPresso inserts the ad or the ad groups.
<div>)<fig>)<H2>/<h3>/<h4>/<h5>/<h6>)<hr>)<iframe>)<img>)<ol>)<p>)<pre>)<table>)<ul>)You also specify the numerical position.
For example, if you select Heading 2 and set the value to “3”, AdPresso inserts the ad after the third <h2> in the content.
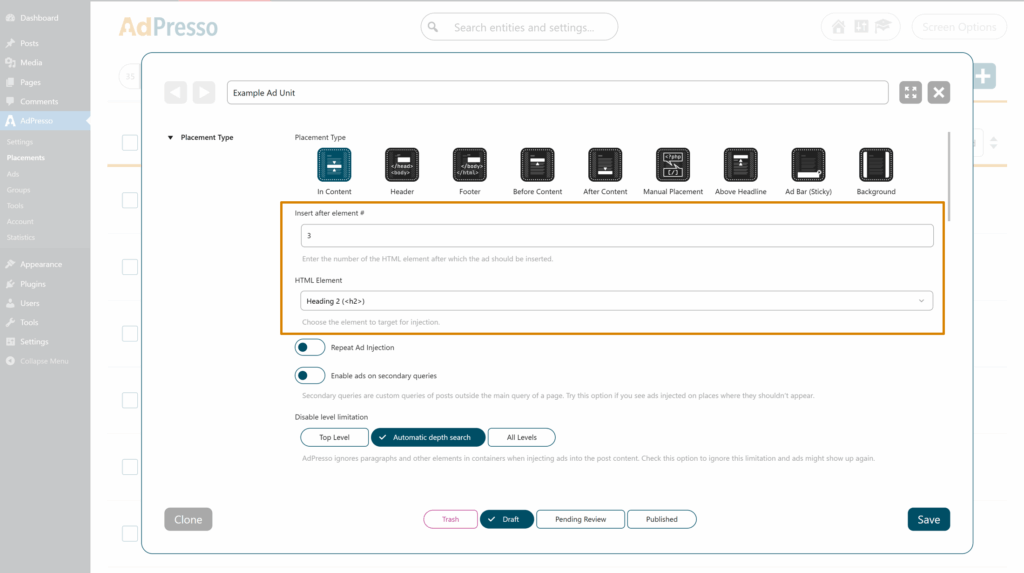
This allows you to anchor ads to structurally relevant points rather than relying on fixed pixel positions.
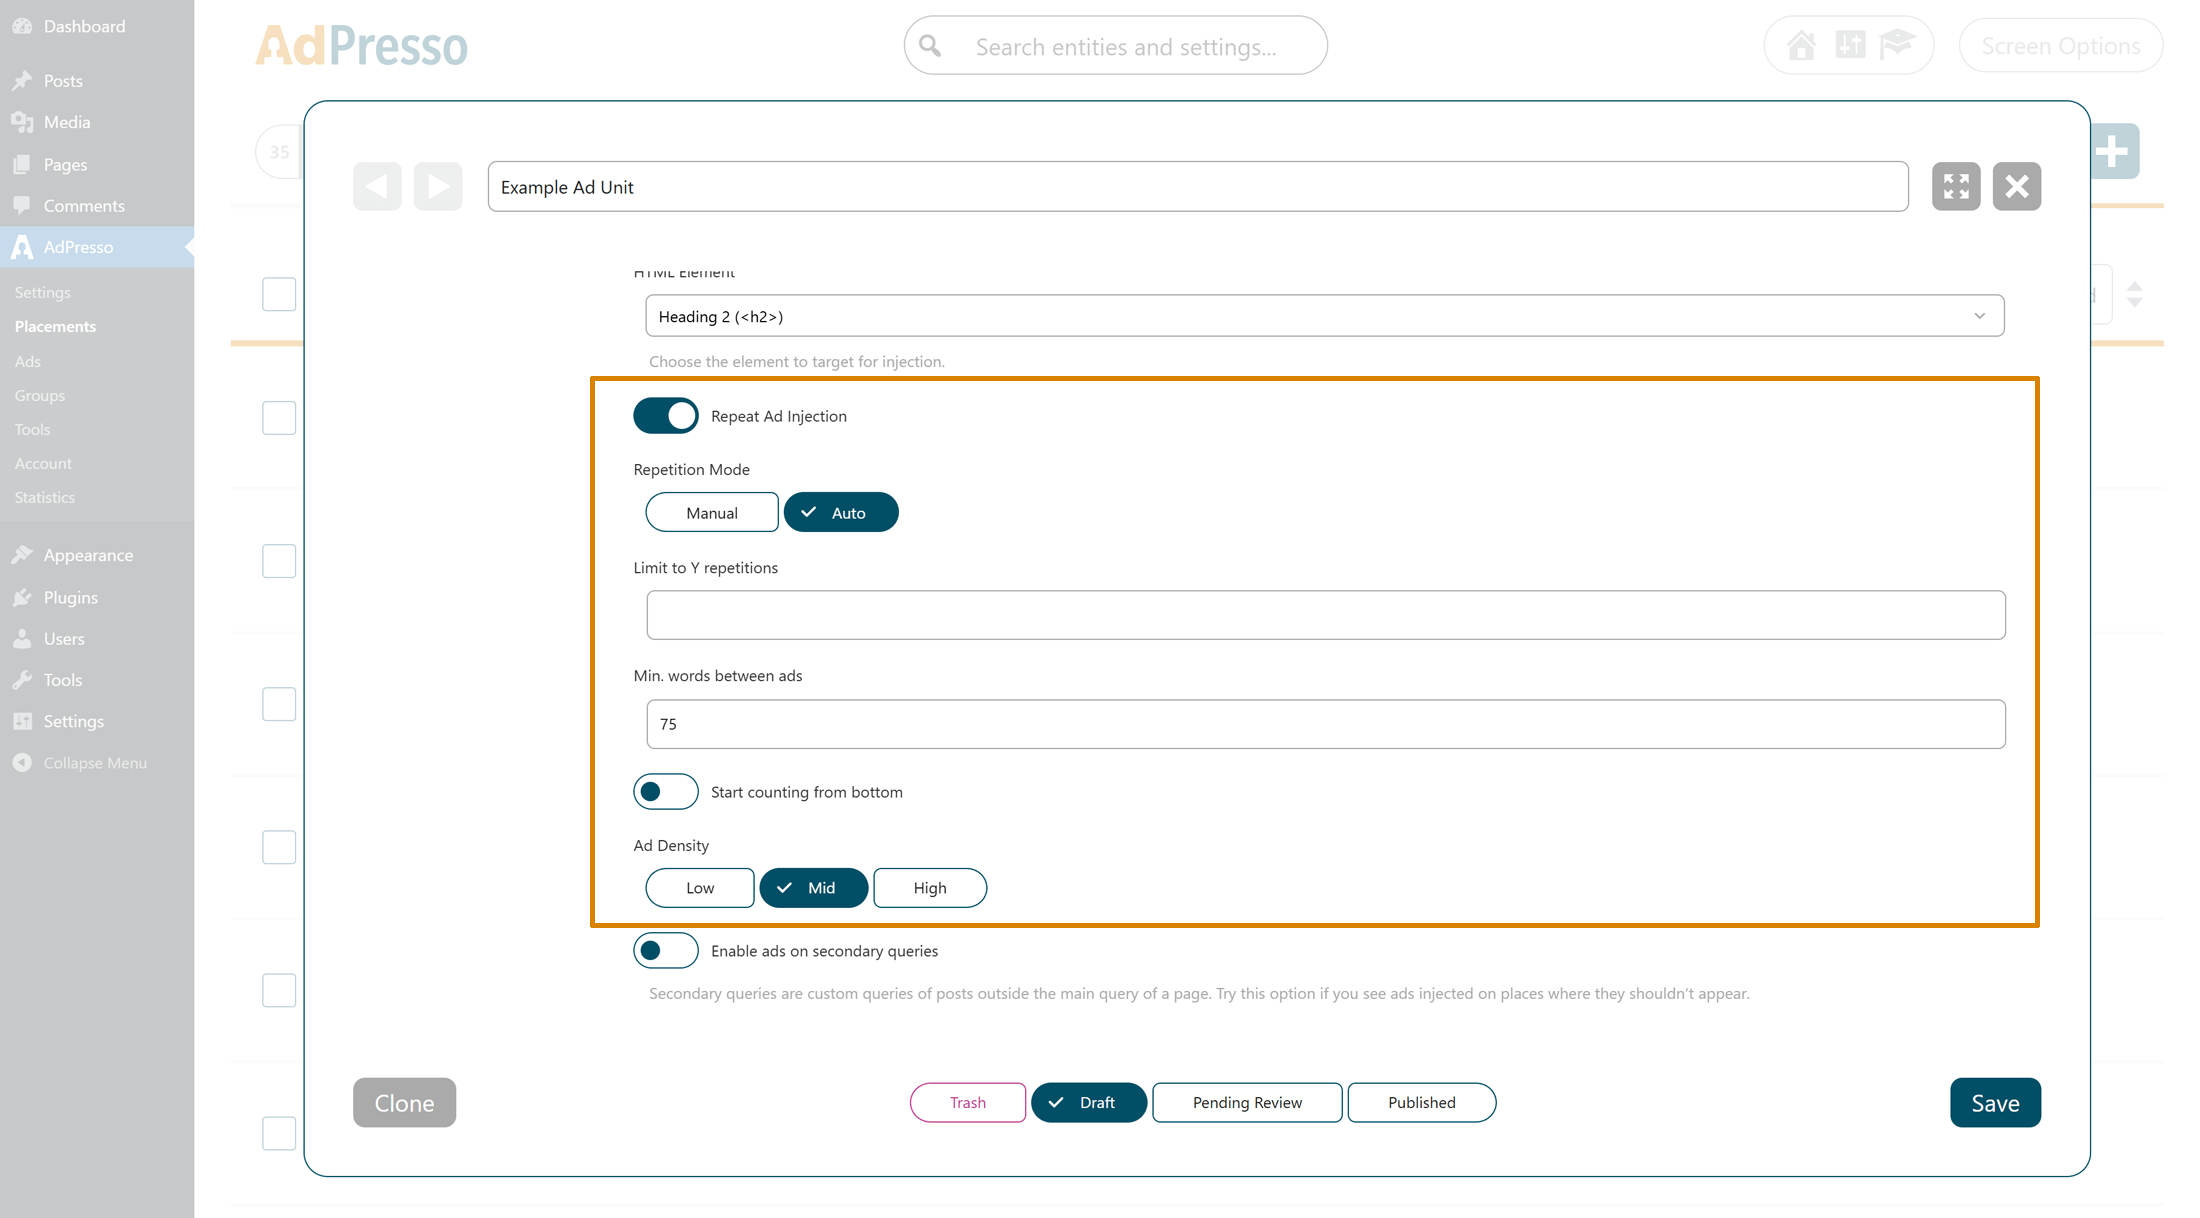
By default, AdPresso counts elements from top to bottom.
If you enable the Start counting from the bottom option, the logic reverses and counts from the end of the content toward the beginning.
Example
If you configure an insertion after the first <h2> and activate this option, AdPresso counts the headings from bottom to top. The ad will therefore appear after the last <h2> in the article. This is particularly useful for placements close to the conclusion of long-form content.
The Repeat Ad Injection feature allows multiple insertions within the same content body. It offers two modes: Manual and Auto.
In the Manual mode, you explicitly define the repetition interval.
You can configure:
Assume you configure the initial insertion after the third <h2> in your article. In addition, you activate Manual Repeat and define that the ad should be injected again after every second <h2> that follows.
In this setup, AdPresso first inserts the ad after the third <h2>. From there, it continues counting forward in the document structure and repeats the injection after the fifth, seventh, ninth, eleventh <h2>, and so on. The repetition follows a fixed structural rhythm based strictly on your defined interval.
This configuration is particularly useful for long-form articles with a clearly structured heading hierarchy, where you want predictable spacing tied directly to content sections.

Now consider a slightly different configuration. You define the first insertion after the second <h2>, set the repetition interval to every third <h2>, and limit the total number of repetitions to two.
In this case, the first ad appears after the second <h2>. The next insertion follows after the fifth <h2>, and the final one after the eighth <h2>. Even if additional qualifying headings appear later in the article, AdPresso stops injecting ads once the configured repetition limit is reached.
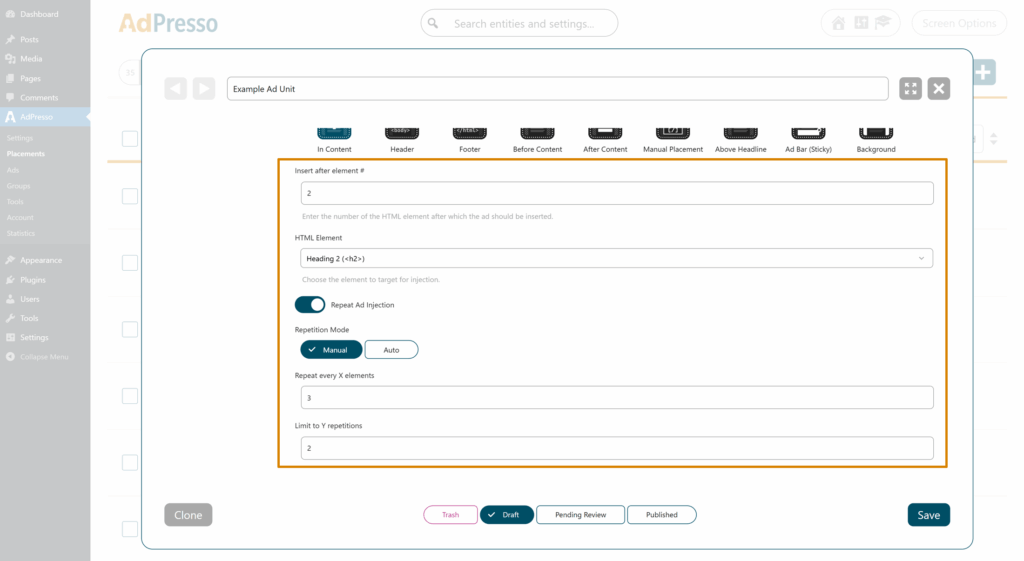
This approach gives you structural consistency while maintaining strict control over the total number of in-content ads.
In this scenario, the first insertion is placed after the third <h2>, and the ad is configured to repeat after every second <h2>. Additionally, you define a minimum word distance of 75 words between injections.
AdPresso initially inserts the ad after the third <h2> and would normally continue with the fifth, seventh, and subsequent headings. However, before each repeated insertion, the system evaluates the textual distance between the previous ad and the next potential injection point. If the content between two headings contains fewer than 75 words, that position is skipped.
For example, if the space between the sixth and seventh <h2> is too short to meet the minimum word requirement, AdPresso bypasses the seventh <h2> and proceeds to evaluate the next eligible heading. The injection then occurs at the next structurally valid position that satisfies the word threshold.
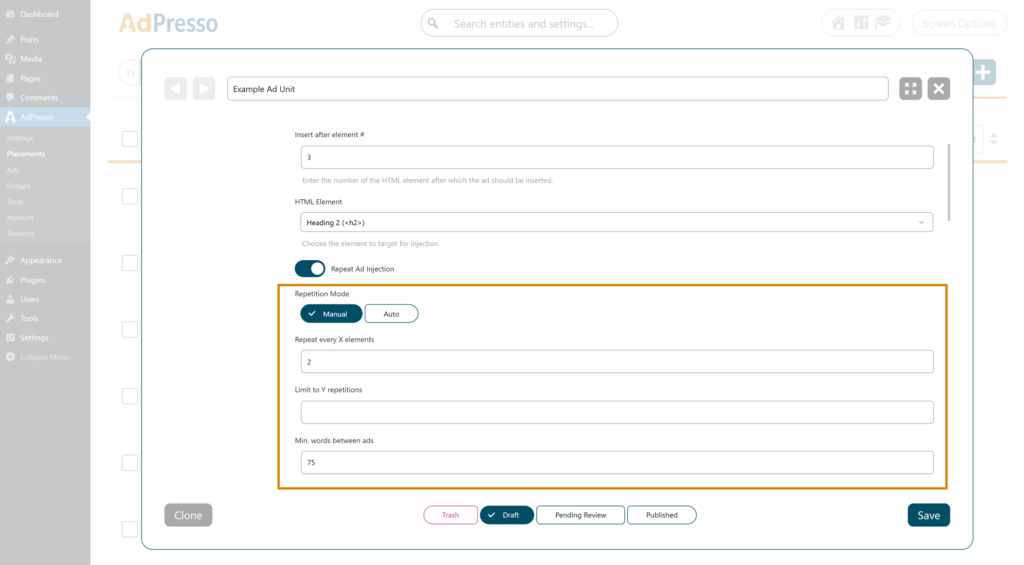
This mechanism prevents overly dense ad clustering and ensures that structural repetition remains aligned with content depth rather than heading frequency alone.
Auto mode is suitable if you prefer an algorithmic distribution over fixed structural anchors. You do not define specific structural intervals. Instead, you control ad density:
Higher density increases the relative number of insertions. Lower density reduces them. You can still limit the total number of insertions or define a minimum word distance between ads.
WordPress content is not standardized at the HTML level. Depending on your theme, custom fields, shortcodes, Gutenberg group blocks, or page builders such as Elementor, the same visual article can be structured very differently in the DOM.
Some websites use a relatively clean structure where paragraphs and headings are direct children of the main content container. Others wrap the entire article in multiple nested <div> elements, columns, or layout wrappers. In more complex setups, even standard text elements are embedded several levels deep.
This structural variance creates a technical challenge for ad injection.
If the injection logic is too strict and only considers direct top-level elements, it may fail on builder-based layouts because the actual <p> and <h2> elements are not direct children of the main content node. As a result, no valid insertion points are detected.
On the other hand, if the injection logic aggressively evaluates all nested levels without restriction, ads may end up inside tables, blockquotes, image captions, compact info boxes, or other semantically sensitive elements. This can visually disrupt the layout and compromise user experience.
The Injection Depth Limit setting allows you to control how deeply AdPresso scans the content structure when searching for valid insertion elements.
AdPresso only considers elements that are direct children of the primary content container. This provides maximum layout protection but may not work reliably with page builders or heavily nested Gutenberg structures.
AdPresso evaluates all nested levels within the content tree. This increases the number of eligible insertion points but also raises the risk of injecting ads inside structurally sensitive components such as tables or captions.
This mode applies a balanced detection strategy. AdPresso evaluates nested structures while applying internal safeguards to avoid typical layout-breaking scenarios. In most modern WordPress environments, this option delivers the most consistent results.
You should review this setting if your site uses a page builder or complex block structures, if ads are not appearing even though valid headings or paragraphs exist, or if ads are rendering inside visually inappropriate elements.
The Injection Depth Limit ensures that Content Placement can adapt to different WordPress architectures without requiring template edits or manual HTML adjustments. It provides a controlled way to align ad injection logic with the structural reality of your site.
Secondary queries refer to custom WordPress loops outside the main content query. By default, Content Placement injects only into the primary content area.
Activate this option to display ads within additional content loops (e.g., custom sections created via theme or builder queries).